Route traffic to a swarm service
Estimated reading time: 5 minutesThis topic applies to Docker Enterprise.
The Docker Enterprise platform business, including products, customers, and employees, has been acquired by Mirantis, inc., effective 13-November-2019. For more information on the acquisition and how it may affect you and your business, refer to the Docker Enterprise Customer FAQ.
After Interlock is deployed, you can launch and publish services and applications. Use Service Labels to configure services to publish themselves to the load balancer.
The following examples assume a DNS entry (or local hosts entry if you are testing locally) exists for each of the applications.
Publish a service with four replicas
Create a Docker Service using two labels:
com.docker.lb.hostscom.docker.lb.port
The com.docker.lb.hosts label instructs Interlock where the service should be available.
The com.docker.lb.port label instructs what port the proxy service should use to access
the upstreams.
Publish a demo service to the host demo.local:
First, create an overlay network so that service traffic is isolated and secure:
$> docker network create -d overlay demo
1se1glh749q1i4pw0kf26mfx5
Next, deploy the application:
$> docker service create \
    --name demo \
    --network demo \
    --label com.docker.lb.hosts=demo.local \
    --label com.docker.lb.port=8080 \
    ehazlett/docker-demo
6r0wiglf5f3bdpcy6zesh1pzx
Interlock detects when the service is available and publishes it. After tasks are running
and the proxy service is updated, the application is available via http://demo.local.
$> curl -s -H "Host: demo.local" http://127.0.0.1/ping
{"instance":"c2f1afe673d4","version":"0.1",request_id":"7bcec438af14f8875ffc3deab9215bc5"}
To increase service capacity, use the Docker Service Scale command:
$> docker service scale demo=4
demo scaled to 4
In this example, four service replicas are configured as upstreams. The load balancer balances traffic across all service replicas.
Publish a service with a web interface
This example deploys a simple service that:
- Has a JSON endpoint that returns the ID of the task serving the request.
- Has a web interface that shows how many tasks the service is running.
- Can be reached at
http://app.example.org.
Create a docker-compose.yml file with:
version: "3.2"

services:
  demo:
    image: ehazlett/docker-demo
    deploy:
      replicas: 1
      labels:
        com.docker.lb.hosts: app.example.org
        com.docker.lb.network: demo_demo-network
        com.docker.lb.port: 8080
    networks:
      - demo-network

networks:
  demo-network:
    driver: overlay
Note that:
- Docker Compose files must reference networks as external. Include
external:truein thedocker-compose.ymlfile. - The
com.docker.lb.hostslabel defines the hostname for the service. When the layer 7 routing solution gets a request containingapp.example.orgin the host header, that request is forwarded to the demo service. - The
com.docker.lb.networkdefines which network theucp-interlock-proxyshould attach to in order to be able to communicate with the demo service. To use layer 7 routing, your services need to be attached to at least one network. If your service is only attached to a single network, you don’t need to add a label to specify which network to use for routing. When using a common stack file for multiple deployments leveraging UCP Interlock / Layer 7 Routing, prefixcom.docker.lb.networkwith the stack name to ensure traffic will be directed to the correct overlay network. When using in combination withcom.docker.lb.ssl_passthroughthe label in mandatory, even if your service is only attached to a single network. - The
com.docker.lb.portlabel specifies which port theucp-interlock-proxyservice should use to communicate with this demo service. - Your service doesn’t need to expose a port in the swarm routing mesh. All communications are done using the network you’ve specified.
Set up your CLI client with a UCP client bundle, and deploy the service:
docker stack deploy --compose-file docker-compose.yml demo
The ucp-interlock service detects that your service is using these labels
and automatically reconfigures the ucp-interlock-proxy service.
Test using the CLI
To test that requests are routed to the demo service, run:
curl --header "Host: app.example.org" \
  http://<ucp-address>:<routing-http-port>/ping
Where:
<ucp-address>is the domain name or IP address of a UCP node.<routing-http-port>is the port you’re using to route HTTP traffic.
If everything is working correctly, you should get a JSON result like:
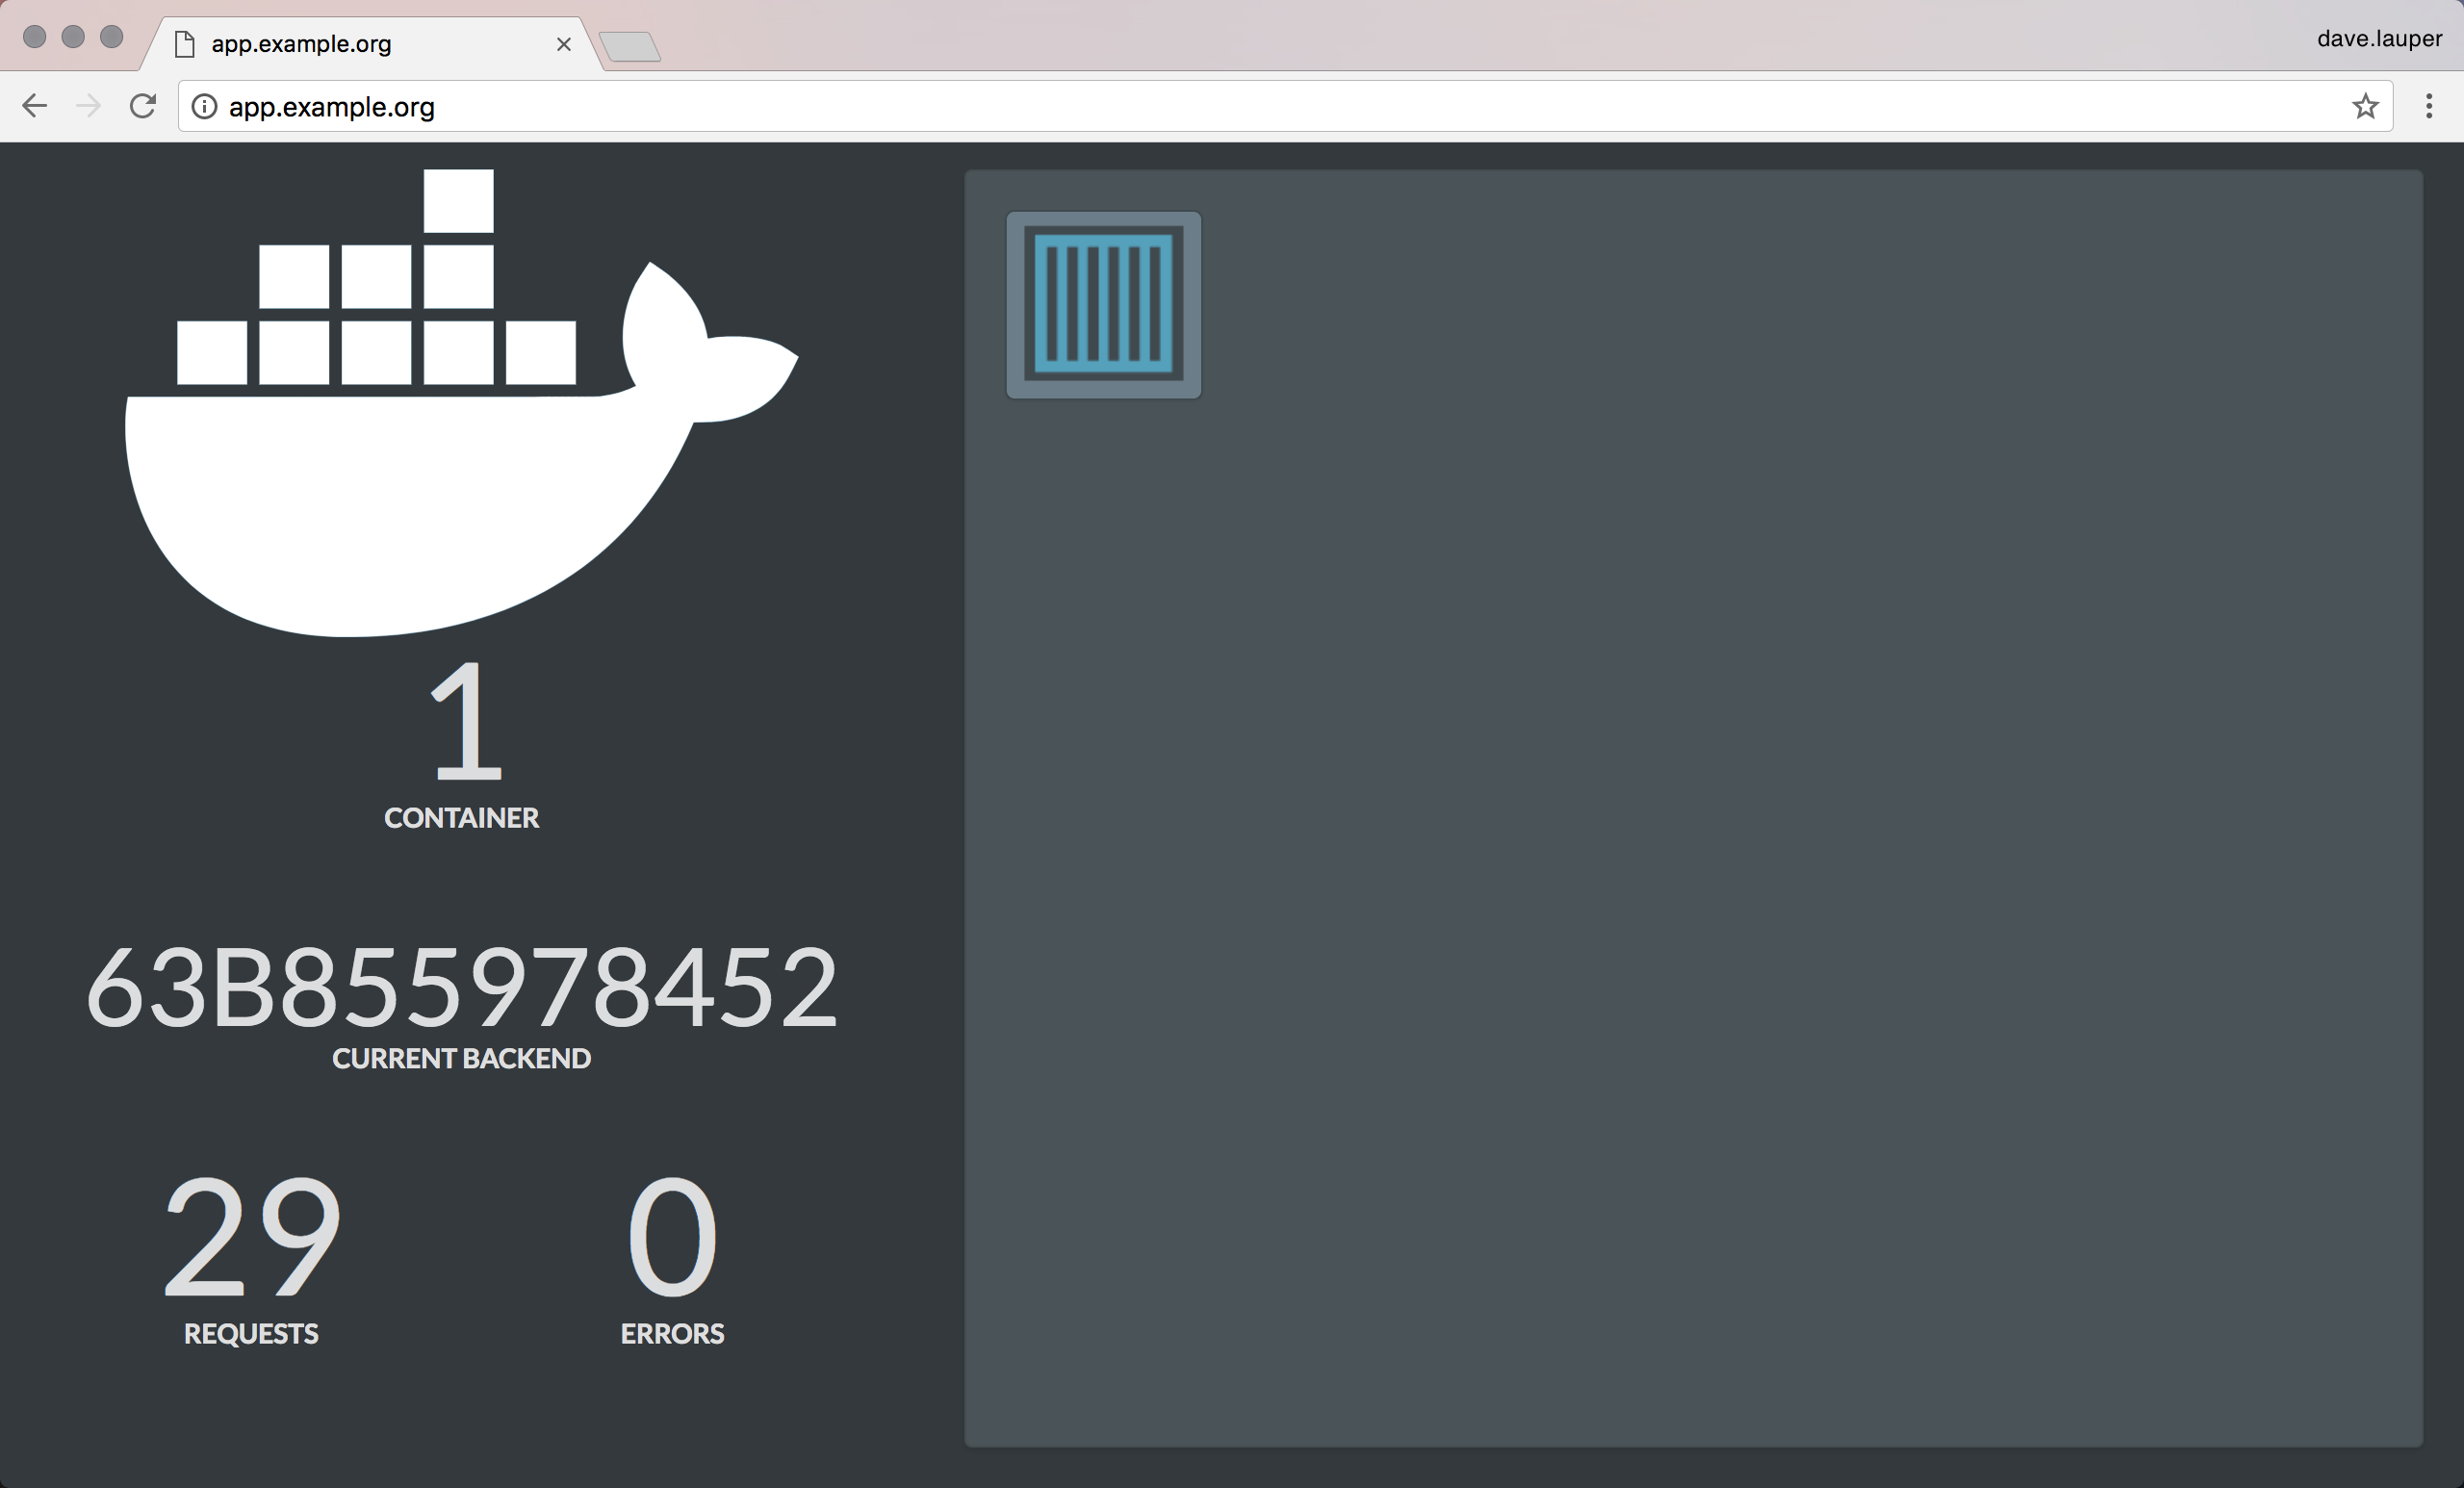
{"instance":"63b855978452", "version":"0.1", "request_id":"d641430be9496937f2669ce6963b67d6"}
Test using a browser
Since the demo service exposes an HTTP endpoint, you can also use your browser to validate that everything is working.
Make sure the /etc/hosts file in your system has an entry mapping
app.example.org to the IP address of a UCP node. Once you do that, you’ll be
able to start using the service from your browser.
Next steps
- Publish a service as a canary instance
- Use context or path-based routing
- Publish a default host service
- Specify a routing mode
- Use routing labels
- Implement redirects
- Implement a service cluster
- Implement persistent (sticky) sessions
- Secure services with TLS
- Configure websockets